Follow these instructions to add bin name tables and bin names to the placeholder yard model. You must have completed the previous steps in sequence.
Before you begin:
Set up a basic N4 topology.
Create a placeholder yard model (on page 1).
Create and upload the placeholder image map (for IG) (on page 1)
To add bin name tables and bin names to the placeholder yard model:
Make a 20' row bin name table:
On the Bin Name Tables tab, click the '+' button. The Add Bin Name Table form opens.
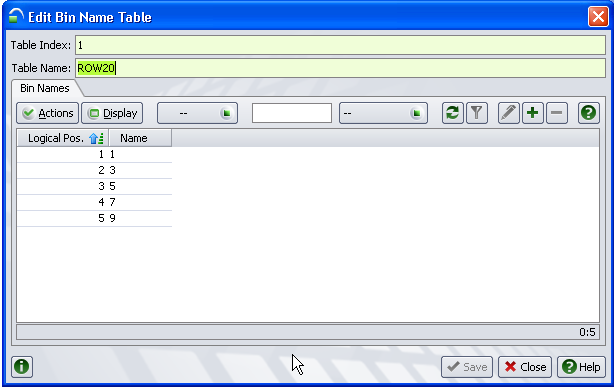
In the Table Index field, enter '1'.
In the Table Name field, enter 'ROW20'.
Click Save. N4 saves the information and makes the lower part of the form available.
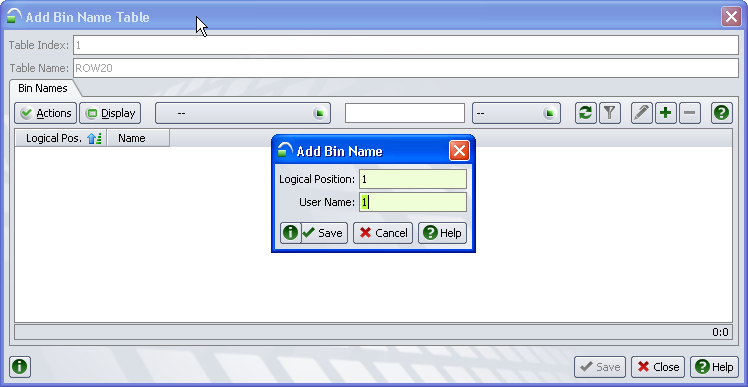
On the Bin Names tab, click the '+' button. The Add Bin Name form opens.
In the Logical Position field, enter '1'.
In the User Name field, enter '1'.
Click Save. The form closes, and the values appear in the Bin Names tab.
Click the '+' button. The Add Bin Name form opens.
In the Logical Position field, enter '2'.
In the User Name field, enter '3'.
Click Save. The form closes, and the values appear in the Bin Names tab.
Repeat steps 7i. - 7k. for Logical Positions 3, 4, and 5/User Names 5, 7, and 9.
Close the Bin Name Table form.
Make a 40' row bin name table:
On the Bin Name Tables tab, click the '+' button. The Add Bin Name Table form opens.
In the Table Index field, enter '2'.
In the Table Name field, enter 'ROW40'.
Click Save. N4 saves the information and makes the lower part of the form available.
On the Bin Names tab, click the '+' button. The Add Bin Name form opens.
In the Logical Position field, enter '1'.
In the User Name field, enter '2'.
Click Save. The form closes, and the values appear in the Bin Names tab.
Click the '+' button. The Add Bin Name form opens.
In the Logical Position field, enter '2'.
In the User Name field, enter '4'.
Click Save. The form closes, and the values appear in the Bin Names tab.
Repeat steps 8j. - 8l. above for Logical Positions 3, 4, and 5/User Names 6, 8, and 10.
Close the Add Bin Name Table form.
Make a tier table:
On the Bin Name Tables tab, click the '+' button. The Add Bin Name Table form opens.
In the Table Index field, enter '3'.
In the Table Name field, enter 'TIER'.
Click Save. N4 saves the information and makes the lower part of the form available.
On the Bin Names tab, click the '+' button. The Add Bin Name form opens.
In the Logical Position field, enter '1'.
In the User Name field, enter '1'.
Click Save. The form closes, and the values appear in the Bin Names tab.
Click the '+' button. The Add Bin Name form opens.
In the Logical Position field, enter '2'.
In the User Name field, enter '2'.
Click Save. The form closes, and the values appear in the Bin Names tab.
Repeat steps 9j. - 9l. above for Logical Positions 3/User Name 3.
Close the Add Bin Name Table form.
Make a Subspot table:
On the Bin Name Tables tab, click the '+' button. The Add Bin Name Table form opens.
In the Table Index field, enter '4'.
In the Table Name field, enter 'SUBSPOT'.
Click Save. N4 saves the information and makes the lower part of the form available.
On the Bin Names tab, click the '+' button. The Add Bin Name form opens.
In the Logical Position field, enter '1'.
In the User Name field, enter '1'.
Click Save. The form closes, and the values appear in the Bin Names tab.
Click the '+' button. The Add Bin Name form opens.
In the Logical Position field, enter '2'.
In the User Name field, enter '2'.
Click Save. The form closes, and the values appear in the Bin Names tab.
Repeat steps 10j. - 10l. above for Logical Positions 3,4,5,6/User Name 3, 4, 5, 6. The Subspot table allows only a maximum of 6 subspot entries.
Close the Add Bin Name Table form.
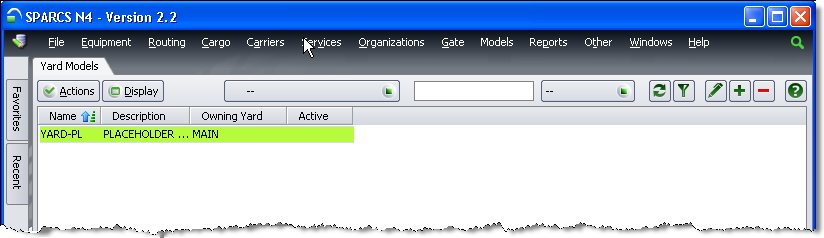
Close the Add Yard Model form. The 'YARD-PL' yard appears in the Yard Model view.
Next step(s):
Create and upload the placeholder image map (on page 1)